New to fastlane? Click here to open the installation & setup instructions first
1) Install the latest Xcode command line tools
xcode-select --install
2) Install fastlane
# Using RubyGems
sudo gem install fastlane -NV

# Alternatively using Homebrew
brew install fastlane
3) Navigate to your project and run
fastlane init
fastlane screenshots for Android
Your app screenshots are probably the most important thing when it comes to convincing potential users to download or purchase your app. Unfortunately, many apps don't do screenshots well. This is often because taking screenshots of your app and then preparing them for display is time consuming, and it's hard to get everything right and consistent! For example:
- Are the screenshots in Google Play inconsistent with your latest app design?
- Is your app localized into many languages that require different screenshots for each?
- Is the same content displayed for each of your size variations?
fastlane tools can automate this process, making it fast and consistent while giving you beautiful results!
Capture Screenshots Automatically
screengrab works with fastlane to automate the process of capturing screenshots of your app. It allows you to:
- Capture hundreds of screenshots in multiple languages on any simulator
- Do something else while the computer takes the screenshots for you
- Configure it once, and store the configuration so anyone on the team can run it
- Get a summary of how your app looks like across all supported devices and languages
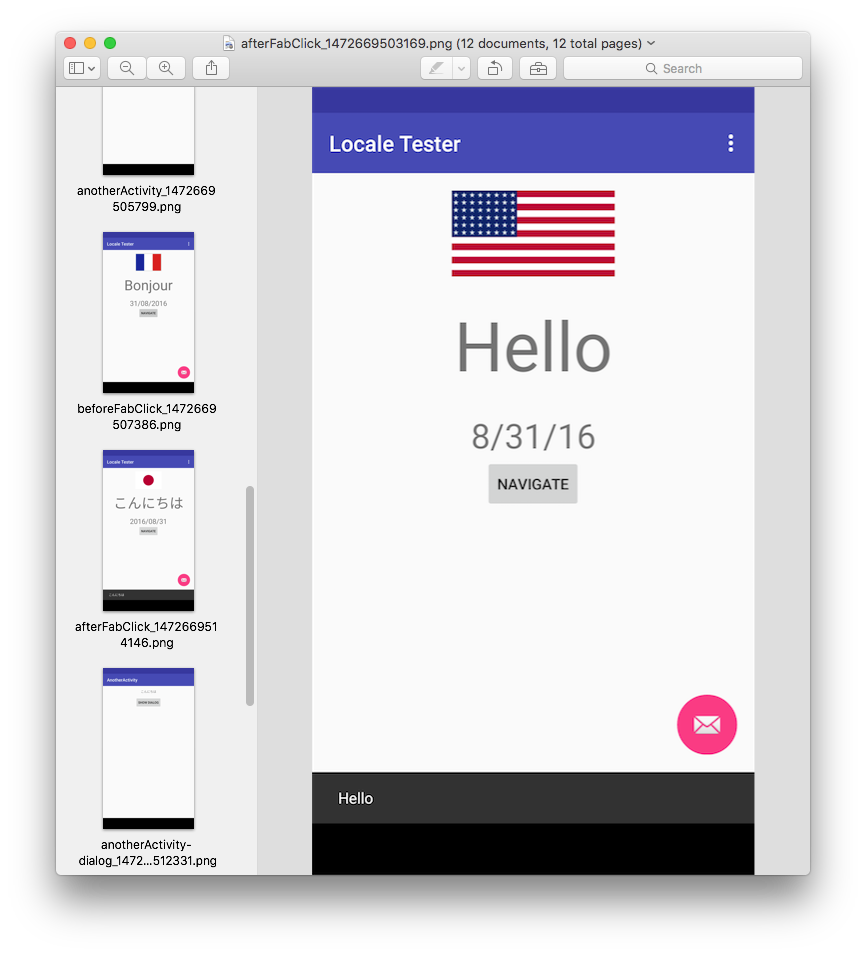
After screengrab completes, it will show you summary of the screenshots you captured:
Getting Started Using Espresso
screengrab uses the capabilities of Android's built-in Instrumented tests combined with Espresso to drive interactions with your app.
To start writing UI Tests with Espresso, checkout the Create UI tests with Espresso Test Recorder video which talks about the Espresso Recording feature for writing UI tests. To learn more about UI testing in Android, refer to the Testing UI for a Single App guide.
Installing screengrab
Install the gem:
sudo gem install screengrab
Gradle dependency
Add the test dependency to your Gradle build:
androidTestImplementation 'tools.fastlane:screengrab:x.x.x'
The latest version is ![]()
Configuring your Manifest Permissions
Ensure that the following permissions exist in your src/debug/AndroidManifest.xml
<!-- Allows unlocking your device and activating its screen so UI tests can succeed -->
<uses-permission android:name="android.permission.DISABLE_KEYGUARD"/>
<uses-permission android:name="android.permission.WAKE_LOCK"/>

<!-- Allows for storing and retrieving screenshots -->
<uses-permission android:name="android.permission.WRITE_EXTERNAL_STORAGE" />
<uses-permission android:name="android.permission.READ_EXTERNAL_STORAGE" />

<!-- Allows changing locales -->
<uses-permission android:name="android.permission.CHANGE_CONFIGURATION" />
Configuring your UI Tests for screengrab
- To handle automatic switching of locales, add
@ClassRule public static final LocaleTestRule localeTestRule = new LocaleTestRule();to /app/java/(AndroidTest)/ExampleInstrumentedTest.java or to your tests class - To capture screenshots, add the following to your tests
Screengrab.screenshot("name_of_screenshot_here");on the appropriate screens
Example UI Test Class (Using JUnit4)
@RunWith(JUnit4.class)
public class ExampleInstrumentedTest {
    @ClassRule
    public static final LocaleTestRule localeTestRule = new LocaleTestRule();

    @Rule
    public ActivityTestRule<MainActivity> activityRule = new ActivityTestRule<>(MainActivity.class);

    @Test
    public void testTakeScreenshot() {
        Screengrab.screenshot("before_button_click");

        // Your custom onView...
        onView(withId(R.id.fab)).perform(click());

        Screengrab.screenshot("after_button_click");
    }
}
There is an example project showing how to use JUnit 3 or 4 and Espresso with the screengrab Java library to capture screenshots during a UI test run.
Using JUnit 4 is preferable because of its ability to perform actions before and after the entire test class is run. This means you will change the device's locale far fewer times when compared with JUnit 3 running those commands before and after each test method.
When using JUnit 3 you'll need to add a bit more code:
- Use
LocaleUtil.changeDeviceLocaleTo(LocaleUtil.getTestLocale());insetUp() - Use
LocaleUtil.changeDeviceLocaleTo(LocaleUtil.getEndingLocale());intearDown() - Use
Screengrab.screenshot("name_of_screenshot_here");to capture screenshots at the appropriate points in your tests
If you're having trouble getting your device unlocked and the screen activated to run tests, try using ScreenUtil.activateScreenForTesting(activity); in your test setup.
Improved screenshot capture with UI Automator
As of screengrab 0.5.0, you can specify different strategies to control the way screengrab captures screenshots. The newer strategy delegates to UI Automator which fixes a number of problems compared to the original strategy:
- Shadows/elevation are correctly captured for Material UI
- Multi-window situations are correctly captured (dialogs, etc.)
- Works on Android N
However, UI Automator requires a device with API level >= 18, so it is not yet the default strategy. To enable it for all screenshots by default, make the following call before your tests run:
Screengrab.setDefaultScreenshotStrategy(new UiAutomatorScreenshotStrategy());
Clean Status Bar
You can use QuickDemo to clean up the status bar for your screenshots.
Generating Screenshots with Screengrab
- Run
./gradlew assembleDebug assembleAndroidTestmanually to generate debug and test APKs- You can also create a lane and use
build_android_app:ruby desc "Build debug and test APK for screenshots" lane :build_for_screengrab do gradle( task: 'clean' ) build_android_app( task: 'assemble', build_type: 'Debug' ) build_android_app( task: 'assemble', build_type: 'AndroidTest' ) end
- You can also create a lane and use
- Run
fastlane screengrabin your app project directory to generate screenshots- You will be prompted to provide any required parameters which are not in your
Screengrabfile, or provided as command line arguments
- You will be prompted to provide any required parameters which are not in your
- Your screenshots will be saved to
fastlane/metadata/androidin the directory where you ranfastlane screengrab
Upload Screenshots to Google Play
After generating your screenshots using fastlane screengrab, you'll usually want to upload them to Google Play.
To upload the screenshots stored in fastlane/metadata/android, just run:
fastlane supply
Use in Fastfile
To put all of this together so that anyone on your team could trigger generating and uploading new screenshots, you can define a fastlane lane called screenshots. It would be responsible for:
- Running your app through screengrab to automatically capture your screenshots
- Having supply send your screenshots to Google Play for use in the store
Add the following code to your fastlane/Fastfile:
lane :screenshots do
  capture_android_screenshots
  upload_to_play_store
end
To get a list of all available options for each of the steps, run
fastlane action capture_android_screenshots
fastlane action upload_to_play_store
Advanced screengrab
Launch Arguments
You can provide additional arguments to your testcases on launch. These strings will be available in your tests through InstrumentationRegistry.getArguments().
launch_arguments([
  "username hjanuschka",
  "build_number 201"
])
Bundle extras = InstrumentationRegistry.getArguments();
String peerID = null;
if (extras != null) {
  if (extras.containsKey("username")) {
    username = extras.getString("username");
    System.out.println("Username: " + username);
  } else {
    System.out.println("No username in extras");
  }
} else {
  System.out.println("No extras");
}