New to fastlane? Click here to open the installation & setup instructions first
1) Install the latest Xcode command line tools
xcode-select --install
2) Install fastlane
# Using RubyGems
sudo gem install fastlane -NV

# Alternatively using Homebrew
brew install fastlane
3) Navigate to your project and run
fastlane init
Setting up your Xcode Project
Xcode 9 and up
In most cases, fastlane will work out of the box with Xcode 9 and up if you selected manual code signing and choose a provisioning profile name for each of your targets.
If you don't use match, we recommend defining a mapping of app target to provisioning profile in your Fastfile. By defining those profiles, you can guarantee reproducible builds every time you run it.
lane :beta do
  build_app(
    export_method: "app-store",
    export_options: {
      provisioningProfiles: {
        "com.example.bundleid" => "Provisioning Profile Name",
        "com.example.bundleid2" => "Provisioning Profile Name 2"
      }
    }
  )
end
You can also use Xcode’s Automatically Manage Signing feature. By default, automatic signing via xcodebuild is disabled. To enable it, pass -allowProvisioningUpdates via the xcargs option:
lane :beta do
  build_app(xcargs: "-allowProvisioningUpdates")
end
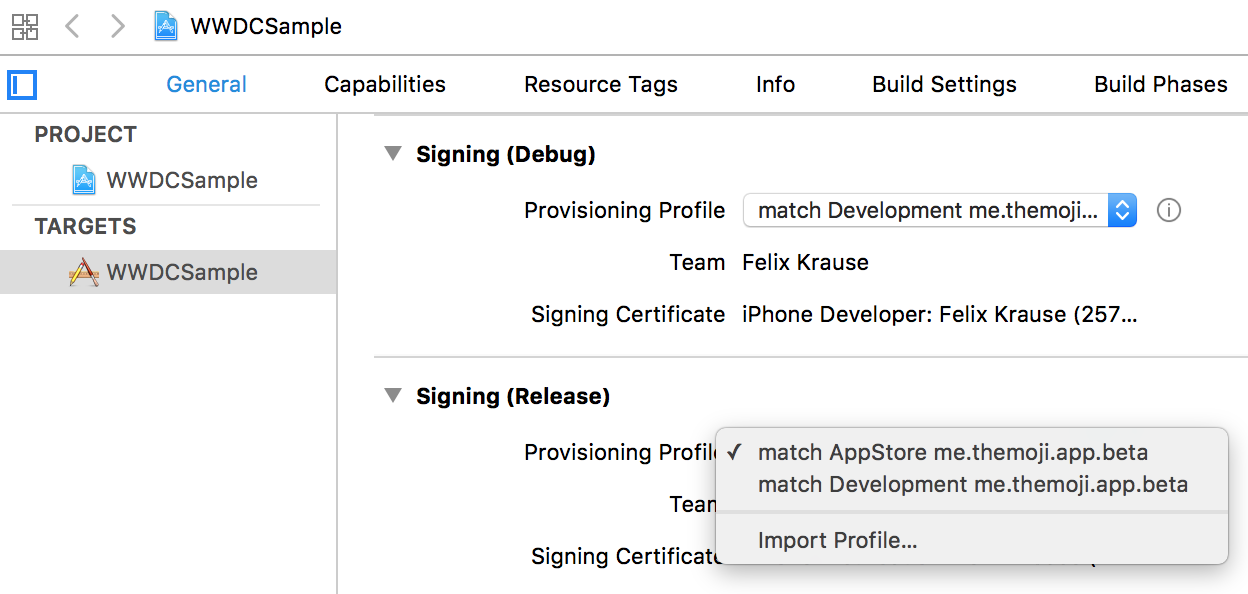
Specify provisioning profile name for each targets
You can set a provisioning profile name for each of your targets. By doing so, Xcode automatically selects the latest provisioning profile matching its name. This way you don't have to update your Xcode project, every time you re-generate your provisioning profile (e.g. when adding a new device)
You can now specify which provisioning profile to use in the General tab after disabling Automatically manage signing.
Alternatively you can also specify the provisioning profile in the Build Settings tab.
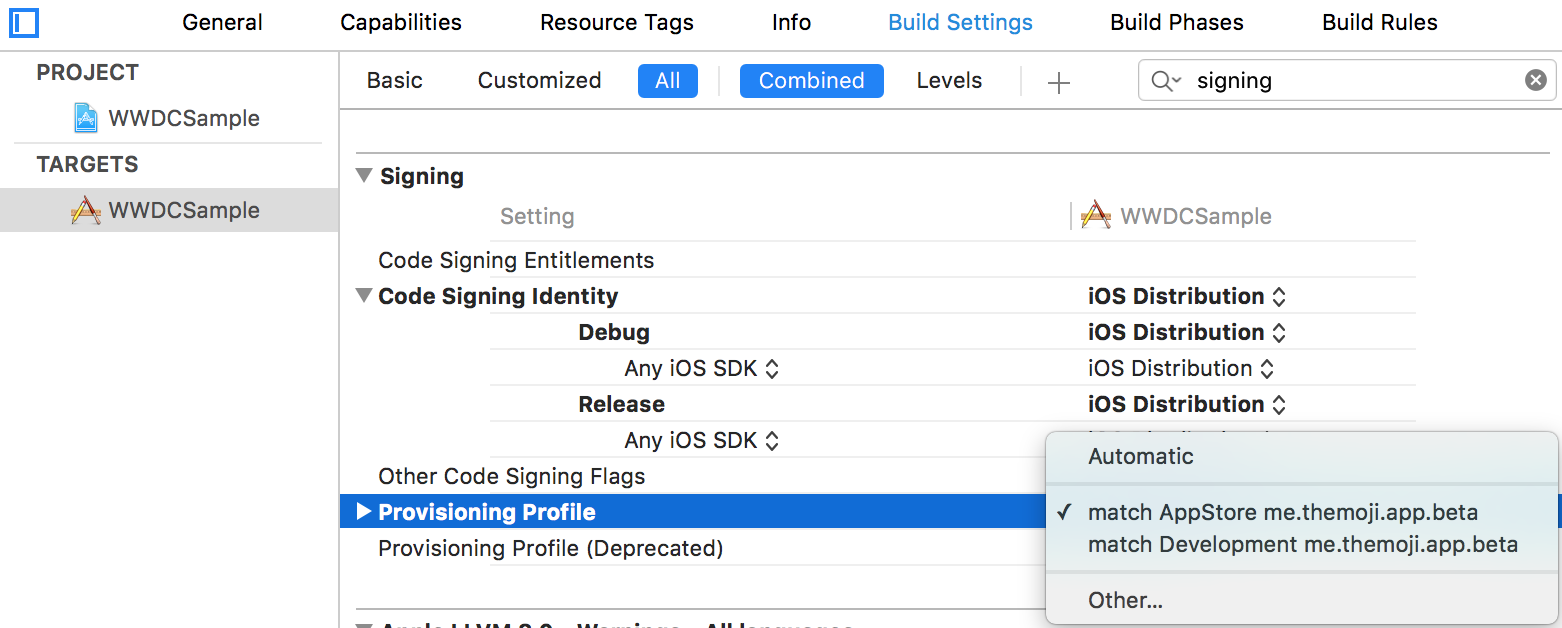
If your provisioning profile is not listed in the drop down, there might be a few reasons:
- It doesn't match the bundle identifier of the target
- The associated certificate or its private key is not installed on the local machine
- The provisioning profile is not installed on the local machine
Check out Debugging codesigning issues for more information on how to debug signing issues.
Build settings
Specify the name of the provisioning profile using the PROVISIONING_PROFILE_SPECIFIER:
DEVELOPMENT_TEAM = N8XAAASEU2;
PROVISIONING_PROFILE_SPECIFIER = "match AppStore me.themoji.app.release";
It is recommended to select the provisioning profile in the General tab in your Xcode project, so Xcode will automatically set the values mentioned above for you.
Set using environment variable
You could pass the profile specifier via environment variables, but usually it's enough to define it statically in your project, per target, since usually neither your Team ID, nor the provisioning profile change.
If you're using match the following environment variables are being set for you:
+---------------------+------------------------------------------------+--------------------------------------+
|                                       Installed Provisioning Profile                                        |
+---------------------+------------------------------------------------+--------------------------------------+
| Parameter           | Environment Variable                           | Value                                |
+---------------------+------------------------------------------------+--------------------------------------+
| App Identifier      |                                                | me.themoji.release                   |
| Type                |                                                | appstore                             |
| Profile UUID        | sigh_me.themoji.beta_appstore                  | 22a19b3a-7cf6-4997-95f2-9cbb4d33fe7e |
| Profile Name        | sigh_me.themoji.beta_appstore_profile-name     | match AppStore me.themoji.release    |
| Development Team ID | sigh_me.themoji.beta_appstore_team-id          | N8XAAASEU2                           |
+---------------------+------------------------------------------------+--------------------------------------+
Using match development or Xcode Automatic Provisioning
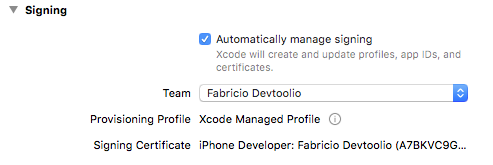
Apple's Automatic Provisioning will automatically generate a private key, development certificate, and managed development provisioning profile for each computer used to build a project. Since Xcode can auto-generate these for you, there is no need to share them between teammates' computers. As such, when using Xcode Automatic Provisioning, there is no need to use match development to keep development keys, certificates, and provisioning profiles in sync.
If you are already using match to manage development code signing, Automatic Provisioning will use the match-generated key and certificate. However, Xcode will create and manage its own provisioning profile and will not use the match-generated profile.
match appstore and Xcode Automatic Provisioning
Xcode Automatic Provisioning doesn't sync your private keys across machines (if you have multiple computers or share them between teammates). To securely store your private key and have access to it from all your devices, use match appstore or match adhoc. This will sync your keys, certificates and provisioning profiles via git, encrypted using OpenSSL.